Good morning everyone, I hope that you had a great weekend and are ready for what should be an even better week. Here in sunny CA things are not so sunny at the moment, the wind is rattling the windows, the rain is falling sideways and according to the weather report we are in for 10 days of rain and wind.
Yes, we need the rain (our state is experiencing drought conditions), but we don't need it all in one week. So, here I am sitting at the computer, hoping our tree planted in the front lawn does not fall down and wondering if our power will hold up today. And yes, those of us in CA are what you call "weather weenies," our "bad" weather is not really all that bad compared to what many of you have experienced, at the same time bring on a little rain here in CA and everything seems to fall apart.
Anyhow, enough of the chit chat, how about we get down to business? Before we get to the new tutorial, how about a GREAT link to previews of all the goodies coming up at Craft & Hobby Association (CHA) Winter 2010 Convention.
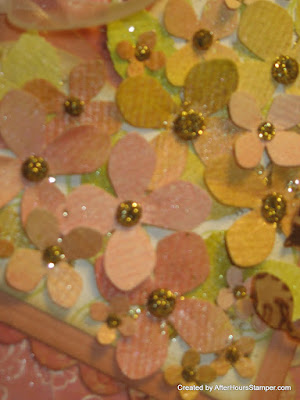
While I would like to take full credit for this technique, the truth is that I saw a card online that inspired me to create this tutorial. Katrina's card was amazing and thought that it would be great technique to use for a heart (Valentine's Day). And of course I had to figure out a way to add some sparkle to the flowers : )
And here is the tutorial on how to make a flowered heart (this tutorial will also be posted on PaperCraftPlanet later today):
Hi everyone, yes, I am actually posting as I promised.
Hope you had a wonderful weekend. I went to a stamping convention on Saturday and it was so much fun! Yes, bought a few things, and I might be able to bring you some very special stamps in the near future, will keep you all informed as things progress. Here is a link to the stamp show pictures, there are quite a few of them so I thought it would be easier for you to view in Picassa rather then here on the blog.
Housekeeping: Some of you many have noticed that earlier in the year I changed my website address to http://afterhoursstamper.com (instead of the afterhoursstamper.blogspot.com). I forgot to update my feedburner and will be putting in my new address this week. I am not sure if you will need to resign up with the new address or if you will still get emails without the change. I will post again on Thursday, after I make the change, and if you do not get that email you will need to sign up again if you want to continue to get my email updates. All you should have to do is to enter your email address again in the box at the top of the blog.
I apologize for any inconvenience my address change may cause, but I promise that this is the only change you will have to deal with. As a way of making up to you I am planning some blog candy in the near future, so make sure you are still signed up for emails after the change.
Of course you would like some links, and I have some really GREAT ones for you to play with, ready? Here we go:
Scrapbook.com: I was on the site looking for a punch and saw that they have an AMAZING color matching tool. Click hereand play with this really wonderful tool (I am surprised they don't charge for this service!) Use the color wheel to choose your base color, then off to the right you choose a color combination, complementary, triadic and so on. You can also click on the layout link to see a simple sketch using your colors.
But wait! There is MORE (just like an infomertial : ) You can upload a photo and their tool will pick the best colors to use with that photo! I played with this for over an hour the other day, really great resource.
Bookmark this tool, it is a keeper! (and I will be adding the link to the blog in the "freebies" section)
Copic Ink Combination Chart: Warning, the file is large (300 plus pages), but you are going to LOVE what Inkyheart has put together. She tells you how you can print out four of these to a page (yes you should print on the same paper that you use to color). I don't know about you, but when I start to color images with my Copics I never remember exactly what colors I used, or what works the best together. This chart will help you to record the combinations you use so you can use them again.
When printing the document I would suggest that you only print out the pages that have the colors you now have, you can always go back and print out any new colors you get later.
Pretty Pressings: Just amazing cards and all sorts of wonderful goodies on this blog. Here is a link on helpful hints to get published, and she has all sorts of copic related tutorials. Make sure to spend some time admiring her amazing coloring and cards, a real treat for the eyes.
The Magic of Pearl Ex: Wow! 50 links on how to use Pearl Ex (including one to the melted crayon tutorial). You can view a tutorial on how to use Pearl Ex with heat and stick powder or how about using Pearl Ex with chalk? All sorts of great ideas on ways to use your Pearl Ex.
Comparison of H20's, Shimmerz and Radiant Pearls: If you are not sure how these products are different, click on the link and see a wonderful comparison of these three popular items. I like all three, use all three and loved that someone did a side by side comparison.
Ok, now for another tutorial. I don't do these every week, but this is my week to post a tutorial on Paper Craft Planet and so you get two tutorials in two weeks! My next turn will be in October and if there is anything specific that you would like me to do a tutorial on please leave your request in the comments or email me : Jacquie at afterhoursstamper.com. I hope you enjoy the tutorial.
Hi everyone, yes, I am still here, though a bit on the tardy side (do four months count as tardy?) Things have been hopping around our home, as usual, and with working more hours my blog has not gotten the attention it deserves. I do promise though that I will work on posting at least once a week, hopefully on Mondays. So, shall we get to the "good stuff?"
I have been posting some tutorials on Paper Craft Planet, and will share them here as well, one of the tutorials, the crayon one, was also posted on Split Coast Stampers and a yahoo group for Michael Strong Stamps. Remember the "Faux Stained Glass" technique (with melted crayons), I have renamed it "Faux Enamel," and changed the technique a bit (and am working on a third way to do this amazing technique as well). Click here to read the updated/changed melted crayon technique.
For those of you who love Magnolia Stamps (the little kids with no faces) you should check out two wonderful resources for Magnolia Stamps. First, if you want to join a group dedicated to these great stamps then go to the yahoo group called "Magnolia-licious" and sign up for a wonderful experience. And if you want to purchase Magnolia stamps click over to Magnolia-licious for some of the best prices around (hint: if you are part of the yahoo group the owner of Magnolia-licious gives a 10 percent discount on your order, a new code is posted to the yahoo group each month).
Here are a few of the cards I have been making using the Magnolia stamps:
Diana is the owner of Magnolia-licious and she provides the absolute BEST customer service, orders are sent very quick and she often includes a little something extra with your order.
Now, how about some other cool links? Though I haven't been posting I have been saving links since April (yes, I have lots of links saved for you), so here are a few:
Copic Family Colors: Really cool listing (Flourishes Newsletter) of some good color groups for Copic markers (yes, I am still addicted to these markers, though I am also using the colored pencils with gamsol).
Make a leaf print: You have to see the print from just using some leaves and a hammer, they are simply amazing. With Fall upon us there are some exciting leaf colors just waiting to be hammered and saved for a special card.
Copic Coloring Tutorial: Wow! This is a very detailed tutorial, and will show you exactly how to get that wonderful seamless blending when you use your copics. Make sure to check out the entire "Paper Crafts by Rach" blog, she has all sorts of challenge blogs listed (by day of the week), listings of blogs that are giving away "blog candy," and her own work is simply breathtaking.
I have really missed everyone and of course posting on the blog, so hang with me as I will be getting back into the swing of things.
Ok, last, but of course not least, here is my tutorial for Paper Craft Planet on how to make glittery embellishments for your cards, let me know if you have any questions.