

Showing posts with label brass stencils. Show all posts

Tuesday, August 24, 2010

Mini blog hop, some heat, and of course some GREAT stamping stuff.

Ok, so for the last few posts I have been writing about how nice our non-summer has been, temperatures in the 80's, nice evenings, and great air quality.  Well, I spoke too soon, yesterday was in the high 90's and today it is supposed to be  over 100.  And while our temps are going up, the trees are starting to change color:

From 2010-08-23

That picture is from a tree right outside my work place, I am planning on taking some more fall pictures of some of the trees in the parking lot as their colors are just starting to change as well, beautiful oranges, reds and yellows.

Anyhow, today is not just about the weather, I have a new set of stamps to preview as well.  Elisabeth Bell has designed a new set of stamps for Susana's Custom Art and Card Design, and WOW, these are just the cutest stamps you have ever seen!

I was given the stamp "Spot of Tea," and here is what I came up with:


From 2010-08-23


Here is a close up of the stamp:

From 2010-08-23


And here is a close up of the background paper I made ( to show the glimmer):


From 2010-08-23

Like these stamps?  Then head over to Marti's blog for another sneak peak of these fantastic stamps!

I used copics to color the image, and to make the background paper I used this stencil, and put some distress ink right on top of the stencil (first I put the color on my craft mat, then sprayed the color with some glimmer mist, then placed the stencil on top of the ink).  I also used some Viva Decor Pearl Pen for the dots on the card.  I also added some Glamour Dust to the shirt for some added bling (if you haven't tried Glamour Dust yet you really should, especially with the holidays coming up.)

And don't forget to head over to the store blog for some amazing blog candy! Make sure you post a comment by August 26th.  Oh, and don't forget to check out all the wonderful new products that Susana has at the store (I am going to go broke trying to get my hands on all the new things!)

If you have made it this far then I am thinking you want some links, so links you shall have!

Colored Pencil Comparison:  Very nice comparison showing how the different colored pencils look when they are blended.  I still love my Prisma's, but I haven't used them much lately......

Tutorials:  From the same blog above, GREAT tutorials on all sorts of things, you are going to find at least one thing here to love.

Just Give Me Stamps:  Inspiration all over the place at this wonderful blog (I spent way too much time admiring all the wonderful creations!)

Tutorials:  Just in time for the holidays, check out these tutorials on all sorts of projects.  The link is from the Just Give Me Stamps blog (linked above as well.).

Allistamp:  Wow, just wow.  This lady has some of the most amazing cards, they are a real treat, and they also will give you all sorts of inspiration.  What I loved is how she creates such wonders without having to have tons of layers.

That is it for this week (it is 92 degrees as I write this on Monday night at 7:00 pm, tomorrow is supposed to be warmer!) time for me to get another glass of lemonade : )

And I hope you all know how very special you are to me, your comments and emails keep me going, you are the reason that this blog is still here.  Thank you for visiting and sharing your love of stamping with me.

Have a wonderful week everyone!


Tuesday, August 17, 2010

Enabler Alert! Read this post at your own risk!

Happy Tuesday!  August is half way finished, and the trees are starting to turn color around here, only problem? We didn't really have a summer, but then again, it has been GREAT not having a high utility bill (no need for AC for most of the summer), and truthfully, I am loving the mild weather.

This is a very long post, and it is divided into three sections, 1.) Cards made using the Dreamweaver paste and stencils, 2.) The room divider I told you about last week and 3.) last, but never ever least, some links to Christmas stamps.

1.) So...why the enabler alert?  Because I think you will like what is being posted today, and you may also want to try out some of the things being posted today : )  As you might know, I am part of the "Follow Your Heart" DT, which is Susana's Custom Art and Card Design blog.  This week we were challenged to use stencils with the DreamWeaver paste...and oh my, I got a bit carried away!

So, here is what I came up with:

From 2010-08-15

Close up:

From 2010-08-15


I used the translucent paste and then sprinkled glitter on to the wet paste after I lifted the stencil off of the paper.  First I tapped some green in spots and then quickly turned the card over so that there were still areas that did not have glitter, then I sprinkled some light blue, flipped and tapped off the extra glitter, then a darker blue.  The design is amazing in person, very 3D and it just glimmers with all that glitter!

Then this happened:

From 2010-08-15

The card above was created using the white embossing paste with some Glamour Dust sprinkled on top of the wet paste.

And then I had to do this:

From 2010-08-15

And then this:

From 2010-08-15

Here are a few more that I stenciled but didn't get around to making a card with yet:

From 2010-08-15


From 2010-08-15


One of the reasons I was carried away with using the paste is that I finally got the hang of doing this technique, and wow!  Once you get the hang of it you really do not want to stop!  Here is a quick video on how to use the embossing paste (hint:  do NOT use any pressure when you are spreading the paste, that was my mistake before, simply spread it over the stencil.  Also, hint 2:  cut your card stock to the exact size of the stencil, hint 3: you can use regular scotch tape because you will not have paper hanging over the edge to worry about.  I taped my stencil to the paper using my craft mat, it worked like a charm).


And here is a link to the videos on Susana's Store blog.

Just one more "hint:" PRACTICE!  I promise that once you get the hang of this you will LOVE it!  It is actually very easy once you practice and learn how to spread the paste.  I have tried this technique before with not so great results, my problem was using too much pressure to spread the paste, all you are doing is gently putting the paste on and spreading.

Don't forget to check out the brass stencils at Susana's store, and the other great stencils she has as well!

Now.....Part 2!

My husband and I were at Costco two weeks ago and I saw a room divider that was PERFECT for my scrapbooking paper!  This is what I used to have:

From stamping area

And this is what is there now:

From 2010-08-15


From 2010-08-15


From 2010-08-15

After we bought the room divider I also ordered some trays for 12x12 paper and what a difference it makes! It is so much better!  And I don't need to worry about the whole thing falling down, and I love having the paper in trays now!

As I am always saying, my area is very small, but I love being in the family room with everyone, and truthfully, even though I would love to have a whole room, I am not sure I want to give up my little corner : )

And now, part 3!  Links!  About this time of the year I start thinking about what type of card I want to make for Christmas, and I thought today it would be fun to list links of Christmas stamps (some are new stamps, some are just ones I like).  So here we go:

Hero Arts:  This link is to the blog, but the store will have their new holiday catalog online starting....TODAY!  Here is a store that has them ready to purchase.

Stampango:  Wait until you see these adorable stamps! And they have quite a few verse stamps as well.

The Stamping Place:  Some wonderful stamps here and lots and lots of variations!

Amuse:  Here are some adorable stamps as well (can you tell that I love Christmas stamps?)

PB Stamps:  Some very cute and unique images here.

GinaK:  This is one set, but it is an exceptional Christmas set.

QKR:  More great stamps here, very nice and would make great cards and other craft items for Christmas.

SlideShow Stamps:  Great retro stamps, and some unique images.

Northwood Rubber Stamps:  TONS of stamps here, click on the Christmas Sayings for a HUGE amount of stamps to choose from.

Ok everyone, that is about all I have for today!  Hope your day is going well, enjoy your week and thank you for visiting!


Monday, June 16, 2008

Why I love brass stencils (with links of course)


After posting the tutorial and video I was thinking about brass stencils, and it came to me that I really do love them, for all the ways you can use them, and also the feel of them. First of all, here are some sites that sell brass stencils:

  • Good Impressions: Wonderful collection of stencils, check out the girls and boys collection. This site also has lots of examples of cards that use embossing, check out their gallery.
  • Stencil With Style: Great site that has lots of how to information, as well as hundreds of stencils. Check out their collection of books on embossing and stenciling, and make sure to learn about their embossing paste, really neat stuff.
So, why do I prefer the brass stencils? For one thing, you can position them on a card better then the embossing folders that go with the Cuttle Bug. And the Cuttle Bug folders don't allow you to chalk the way you can with a brass stencil: emboss, leave the brass stencil on the paper, color the exposed part of your image, take off the stencil and admire your neat chalking (or inking).

Brass stencils are not cheap, but then again they can also be used without embossing. You can go over a brass stencil with a dauber and ink to leave a nice stenciled (rather then embossed image). You can also use a product called "Embossing Paste" which you apply over your stencil, remove the stencil and you have a raised image. The paste comes in various colors, white, black, metallic, and you can paint over the paste if you like.

I love that you can do so much with embossing, even choosing methods to color in your image. You can do a fine glitter on your image, use embossing powder for a neat effect, chalk, ink, pearl-ex, perfect pearl, there really is no limit to the creative possibilities.

Do you like brass stencils? Why, or why not? Do you have a stencil you really like to use? Post a link to an image or card in the comments for our viewing. Please share any links to other places that you like to purchase your brass stencils.

Also, if you have tried using the recipe I posted for using brass stencils with your cuttle bug, please leave a comment and let me know how it worked for you.

Note: Wine4Me posted a great substitute for the gasket kit (on SCS). She found the rubber (where the tubing and wire are stocked) at Lowe's for about $3 a yard! Great find and thank you for sharing Wine4Me.

Take care and may tomorrow be your best day yet : )

Sunday, June 15, 2008

Video: How to use your brass stencils with the Cuttle Bug

Finally finished the video! Not sure if the embossing or the glitter shows up all that well, but the rest of it came out pretty good. I also included a few things on how to color in your embossed image, and wish there was more time because I left off more then I included...oh well, maybe another video : )

Please let me know what you think, especially if the video is helpful. If you have any questions you can leave a comment or send me an email.

Click on the play button to play the video without leaving my blog, or click on the image to go to YouTube.

Update: Here is a link to a number of places that sell the gasket kit online. Some of these retailers only sell the gasket in sets, 12 in a set, so the price is higher because you get so many.


Hope you have had a wonderful Father's Day : )

Thursday, June 12, 2008

Tutorial: How to dry emboss brass stencils and fiskars embossing plates with your Cuttle Bug

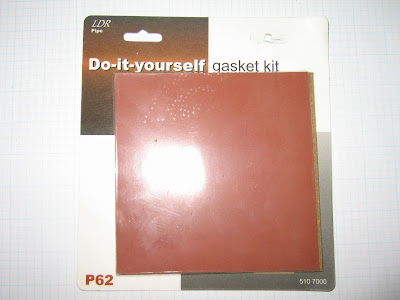
If you have a Cuttle Bug you most likely have tried to emboss with your brass stencils. I did, and didn't have much luck, even when I followed some of the recipes that have been published. Then, the other day on a SCS forum I read that someone used a red rubber plumbers gasket with good results. So off I went to my local hardware store, found the gasket, came home and was amazed at the how well the red rubber gasket worked! And get this, the "kit" was only $2.49! That makes this all the more fun : )

Here is a tutorial on what I did and the results. I wanted to be able to use my brass stencils as rubber stamping supplies are so expensive, and being able to use my stencils with good results is a cost saver! Please be aware that you need to make sure that this recipe will go through your machine, they are all a bit different, and if you have to force the plates through too much the recipe may not be right for your machine.

First you will need to get the gasket kit, which looks like this:


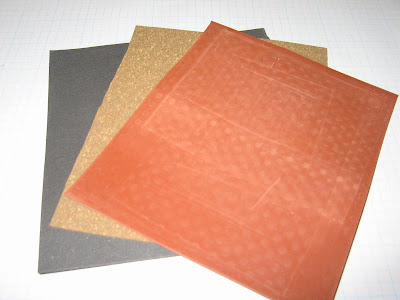
The package contains three pads, one is black and I am not sure what it is made of, the other is cork, and the third one is red rubber (almost the same type that stamps are made of, or at least it feels like it). Here is what is in the package:


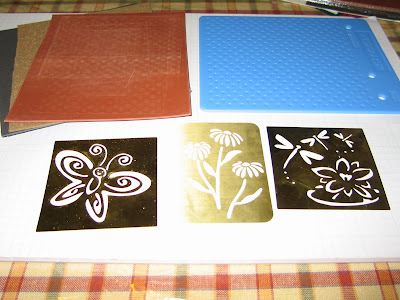
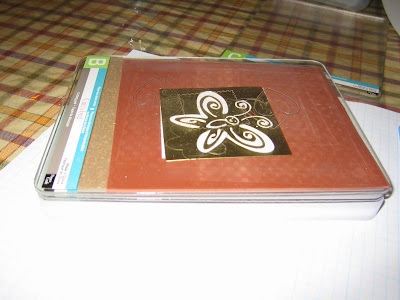
I picked these brass stencils and fiskar embossing plate to demonstrate this recipe:


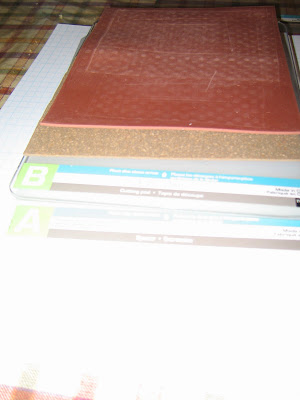
The recipe is as follows:

Plate A
Plate B
Cork Pad from the gasket kit
Red Rubber Pad from the gasket kit
Card Stock
Stencil
Plate B

Make sure you line everything up nice and square. Also, I did notice that the thicker brass stencils left a bit better impression, though the thin ones worked great with this method.

Here is what the recipe looks like before you put your cardstock, stencil and last plate B on:


The whole enchilada:


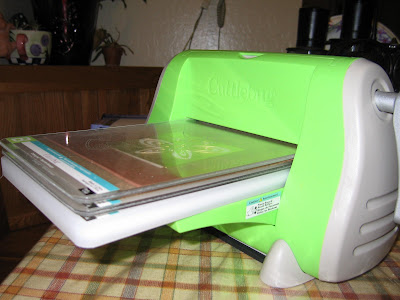
Here it is going through the machine (when I use this method I make sure to roll almost to the end, then reverse so I get two passes over the stencil)


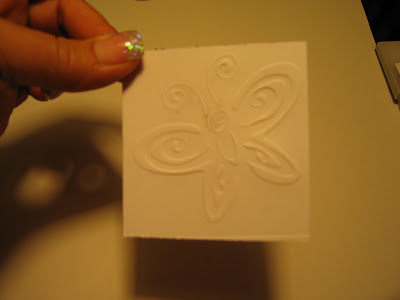
And here is the result:


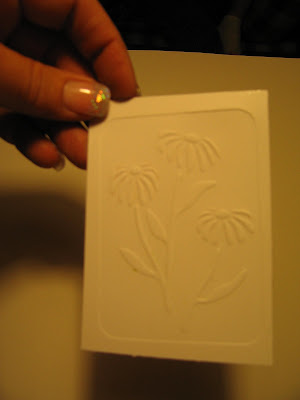
And a few more:


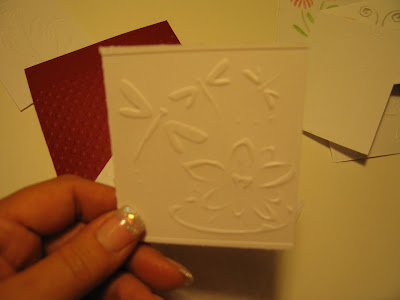
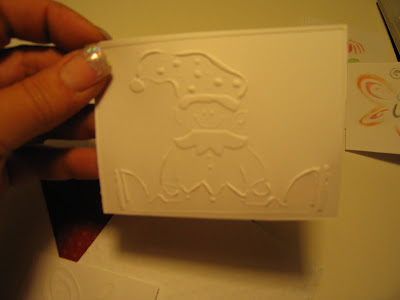
They all came out nice and deep, very close to doing the embossing by hand.

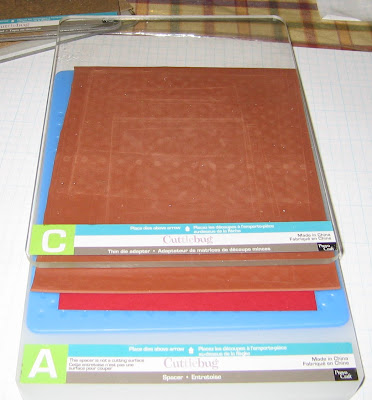
Now for the fiskars recipe:

Plate A
Fiskars embossing plate
Card stock
Red Rubber Pad
Plate C

Here is what it should look like all together:


Make sure to square everything up, I have it spread out to show you in the picture.

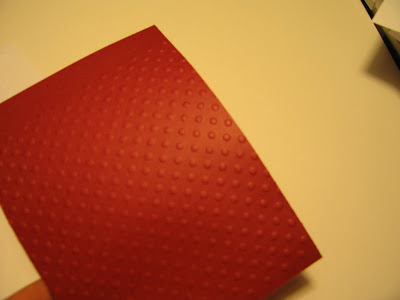
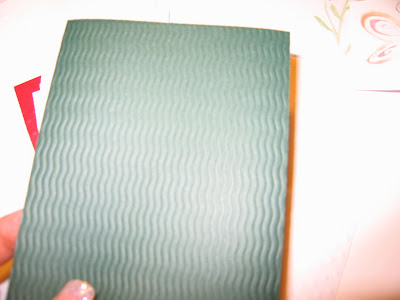
And this is what the embossing looks like:


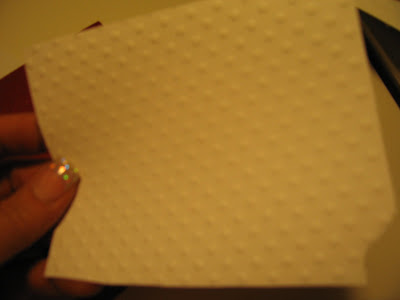
This photo is a bit blurry, but I wanted you to see how nice the swiss dots are on the white card stock:


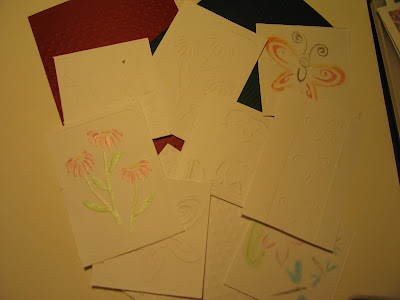
And here is a picture of all the embossing I did tonight with this recipe/method:


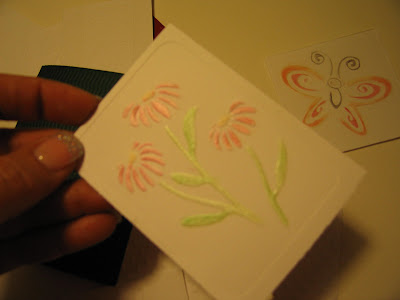
And a close up of one that I chalked:


I hope you have found this tutorial useful! Questions? Email me or leave a comment! I will work on getting this tutorial on video this weekend, and yes, I still have cards to finish.....at least I got one done today.

Have a fabulous Friday!
Blog Widget by LinkWithin