Showing posts with label plumbers gasket. Show all posts

Thursday, June 12, 2008

Tutorial: How to dry emboss brass stencils and fiskars embossing plates with your Cuttle Bug

If you have a Cuttle Bug you most likely have tried to emboss with your brass stencils. I did, and didn't have much luck, even when I followed some of the recipes that have been published. Then, the other day on a SCS forum I read that someone used a red rubber plumbers gasket with good results. So off I went to my local hardware store, found the gasket, came home and was amazed at the how well the red rubber gasket worked! And get this, the "kit" was only $2.49! That makes this all the more fun : )

Here is a tutorial on what I did and the results. I wanted to be able to use my brass stencils as rubber stamping supplies are so expensive, and being able to use my stencils with good results is a cost saver! Please be aware that you need to make sure that this recipe will go through your machine, they are all a bit different, and if you have to force the plates through too much the recipe may not be right for your machine.

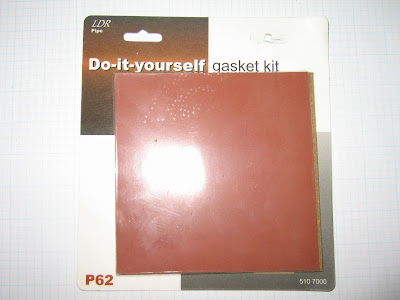
First you will need to get the gasket kit, which looks like this:


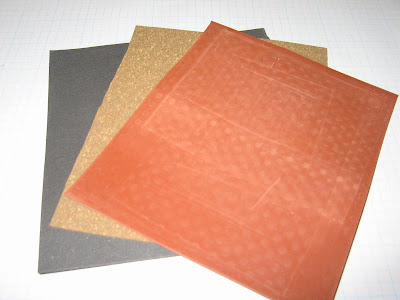
The package contains three pads, one is black and I am not sure what it is made of, the other is cork, and the third one is red rubber (almost the same type that stamps are made of, or at least it feels like it). Here is what is in the package:


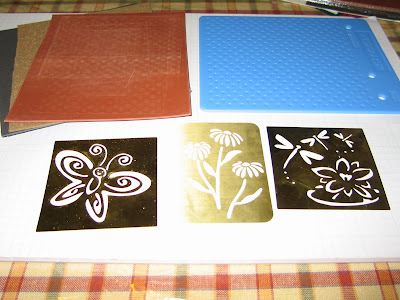
I picked these brass stencils and fiskar embossing plate to demonstrate this recipe:


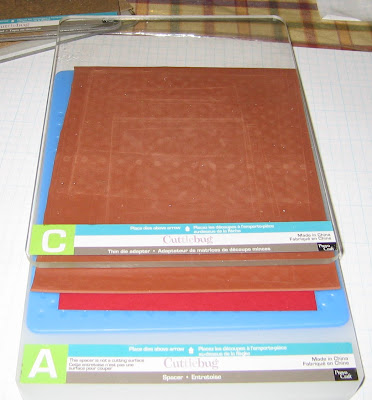
The recipe is as follows:
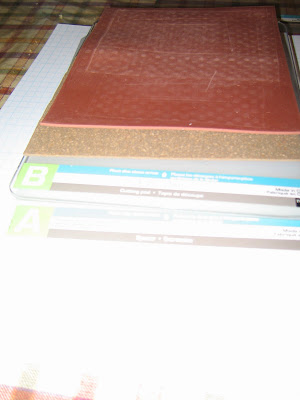
Plate A
Plate B
Cork Pad from the gasket kit
Red Rubber Pad from the gasket kit
Card Stock
Stencil
Plate B

Make sure you line everything up nice and square. Also, I did notice that the thicker brass stencils left a bit better impression, though the thin ones worked great with this method.

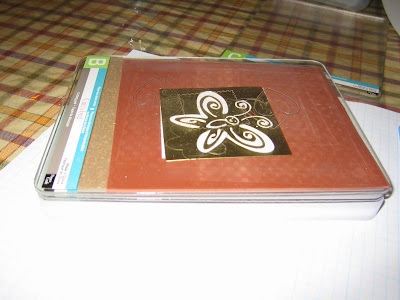
Here is what the recipe looks like before you put your cardstock, stencil and last plate B on:


The whole enchilada:


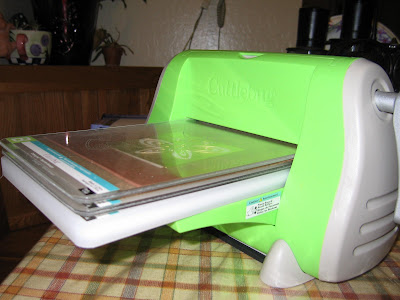
Here it is going through the machine (when I use this method I make sure to roll almost to the end, then reverse so I get two passes over the stencil)


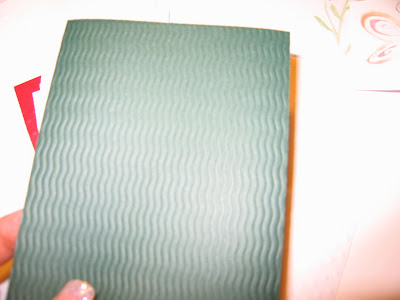
And here is the result:
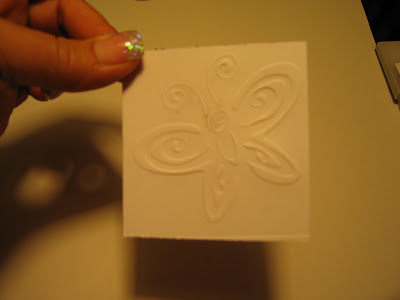


And a few more:


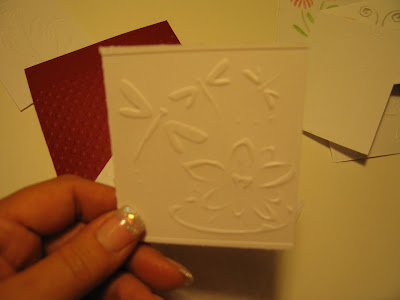
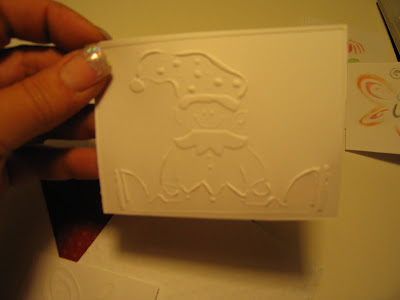
They all came out nice and deep, very close to doing the embossing by hand.

Now for the fiskars recipe:

Plate A
Fiskars embossing plate
Card stock
Red Rubber Pad
Plate C

Here is what it should look like all together:


Make sure to square everything up, I have it spread out to show you in the picture.

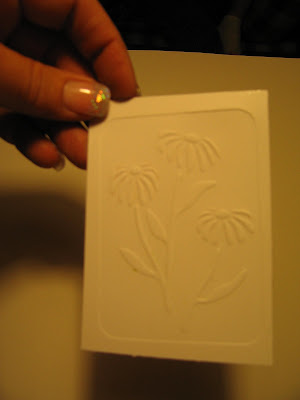
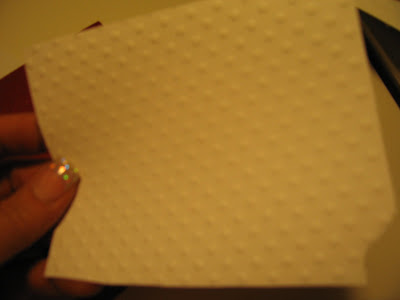
And this is what the embossing looks like:


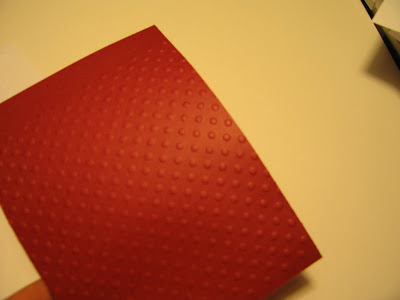
This photo is a bit blurry, but I wanted you to see how nice the swiss dots are on the white card stock:


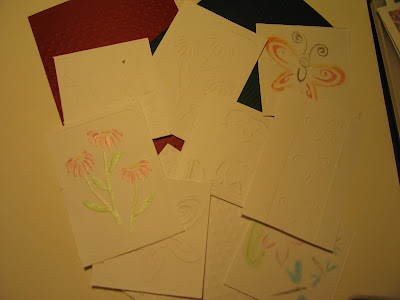
And here is a picture of all the embossing I did tonight with this recipe/method:


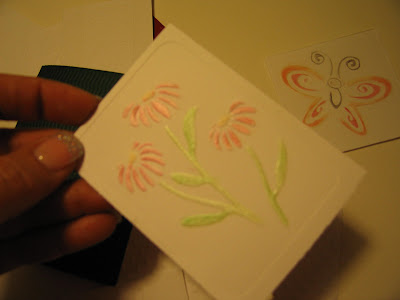
And a close up of one that I chalked:


I hope you have found this tutorial useful! Questions? Email me or leave a comment! I will work on getting this tutorial on video this weekend, and yes, I still have cards to finish.....at least I got one done today.

Have a fabulous Friday!

Wednesday, June 11, 2008

A huge thank you to Paula of Crafty Storage

A few days ago I sent Paula (Crafty Storage) some photos of my little ole crafting area, and today she included me on her blog! Wow! I feel so honored, especially since my little area is so pitiful compared to the great studies she frequently shows. If you have not yet visited her blog, take a moment to stop on over there, some amazing craft rooms and studios.

Here is the link to the photo album of my craft area, not much, but it works. I am finding that I really need to get my stamps unmounted (yes, I am going to unmount them all) so that I can free up some of the shelf space for more paper and tools. Bought some of the EZ mount, but need to order more sheets (though I have only used one sheet so far I can see that there isn't enough to finish the job). Unmounted stamps are great, less room, and in my opinion, easier to use. And they can make stamping faster.

For instance, you can combine stamps on the acrylic block to make a combination of images without having to stamp, ink, stamp again, you just place your stamps on the block as you want them to stamp out, ink them up and poof, you are done. For some reason I also think I get a better image with the unmounted stamps, but have not really tested that out yet.

Anyhow, one last thing, I recently bought a cuttle bug and wanted to figure out how to use my brass stencils with the machine. After reading and seeing lots of hints, I think I have come up with a perfect recipe (I have printed out a few of them and they all work, but I wanted a deeper embossed image): Plate A, Plate B, piece of cork from plumbers gasket kit, red rubber from plumbers gasket kit, card stock, stencil, plate B. This recipe really seemed to make the embossing stand out as if I had done the whole image the traditional way! I also used the red rubber for fiskar embossing plates, but had to add a shim of two sheets of water color paper to make the image really emboss.

So, my next tutorial will be on the best recipes for your cuttle bug! What I love about the plumbers kit is that I paid $2.49 at my local hardware store! Of course I bought two, and of course I am going to take pictures for the tutorial. Most likely the tutorial won't be done till this weekend, unless I get my cards done before that. Will do both a written and video of the process.


Yesterday I posted the card I made for my Dad (still have to make my hubby's and my brothers cards). The reason I did the lighthouse is because my Dad has a place in Bodega Bay (Northern CA), and it has an amazing view of the ocean. So today I thought I would post a few pictures of his place, and some of the surrounding area:


This is what you see as you drive towards Bodega Bay. Before getting to this point you are on a major freeway, US 101, but then you cut over and wind through the country. When we get on this part of the drive I always start to relax and just soak in the beauty of the area.


This is the front of my Dad's place, that is my hubby getting stuff out of our van. These pictures are about four or more years old.


This is the view from the window, it is amazing, you can see from Bodega Bay to Point Reyes. This is just one of the windows, there are three, and this one is on the far right of the room.


This is a sunset, taken from the middle window.....I just love this picture. The field that is in the foreground has deer and jack rabbits in the morning, really neat.


This is my Dad : ), getting ready to cook some crabs that he picked up at the local wharf. Love this kitchen because it is open to the living room so while you cook you look out over the ocean.

Happy Dad's Day Dad!
Have a great day, I am off to pick up my son from work and then get to bed so I can get some cards made tomorrow.
Blog Widget by LinkWithin