


Here is a tutorial on what I did and the results. I wanted to be able to use my brass stencils as rubber stamping supplies are so expensive, and being able to use my stencils with good results is a cost saver! Please be aware that you need to make sure that this recipe will go through your machine, they are all a bit different, and if you have to force the plates through too much the recipe may not be right for your machine.
First you will need to get the gasket kit, which looks like this:
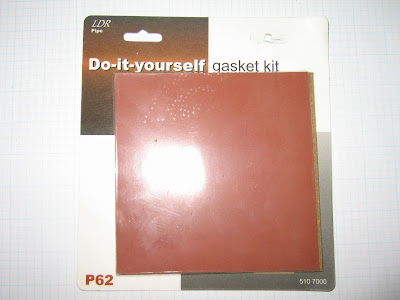
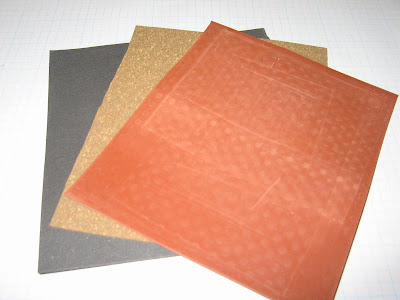
The package contains three pads, one is black and I am not sure what it is made of, the other is cork, and the third one is red rubber (almost the same type that stamps are made of, or at least it feels like it). Here is what is in the package:
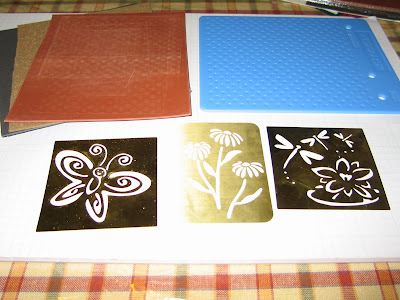
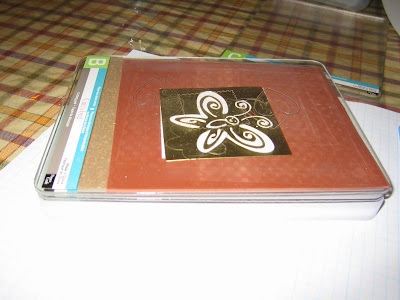
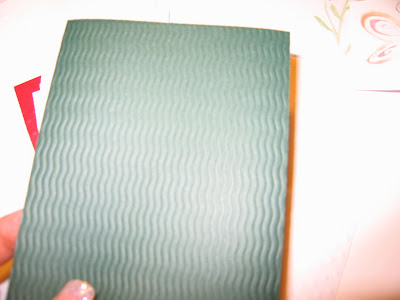
I picked these brass stencils and fiskar embossing plate to demonstrate this recipe:
The recipe is as follows:
Plate A
Plate B
Cork Pad from the gasket kit
Red Rubber Pad from the gasket kit
Card Stock
Stencil
Plate B
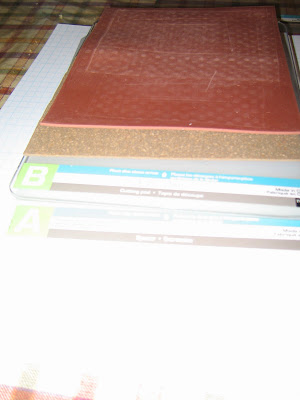
Make sure you line everything up nice and square. Also, I did notice that the thicker brass stencils left a bit better impression, though the thin ones worked great with this method.
Here is what the recipe looks like before you put your cardstock, stencil and last plate B on:
The whole enchilada:
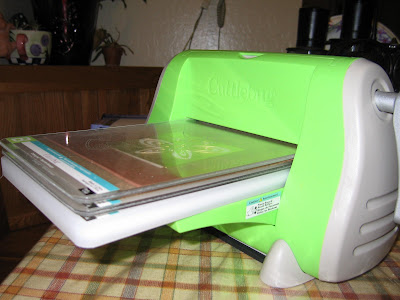
Here it is going through the machine (when I use this method I make sure to roll almost to the end, then reverse so I get two passes over the stencil)
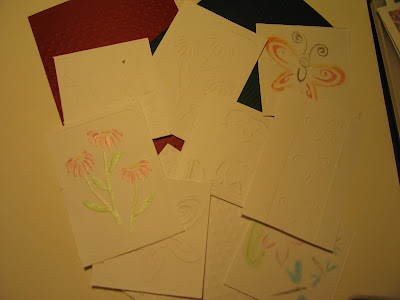
And here is the result:
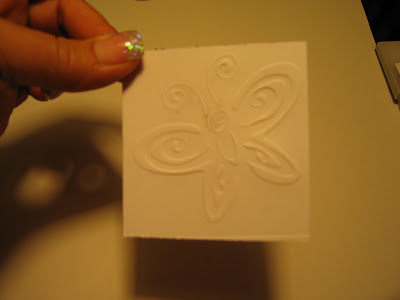
And a few more:
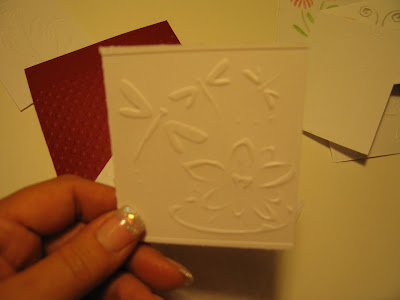
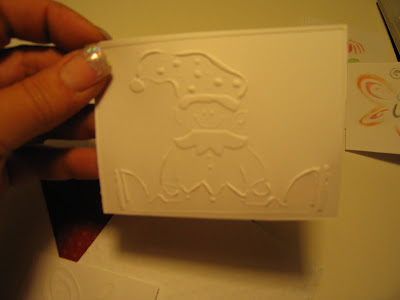
They all came out nice and deep, very close to doing the embossing by hand.
Now for the fiskars recipe:
Plate A
Fiskars embossing plate
Card stock
Red Rubber Pad
Plate C
Here is what it should look like all together:
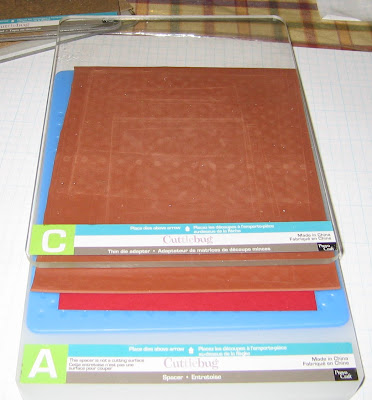
Make sure to square everything up, I have it spread out to show you in the picture.
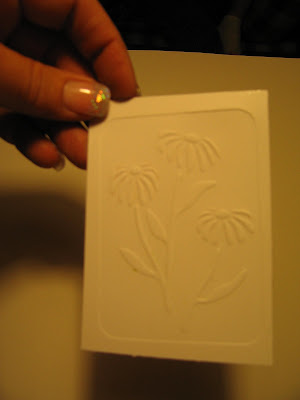
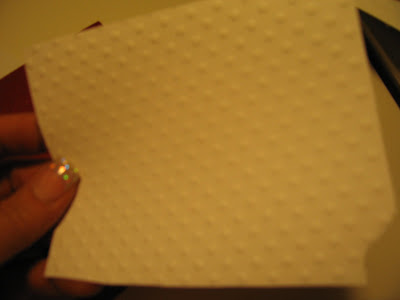
And this is what the embossing looks like:
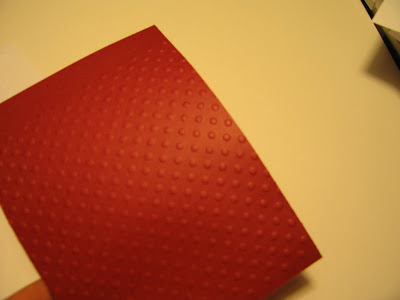
This photo is a bit blurry, but I wanted you to see how nice the swiss dots are on the white card stock:
And here is a picture of all the embossing I did tonight with this recipe/method:
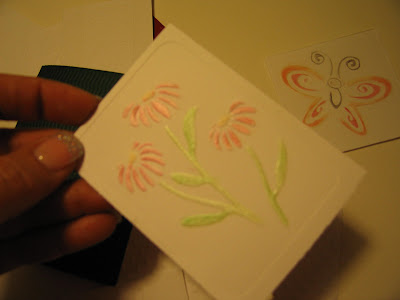
And a close up of one that I chalked:
I hope you have found this tutorial useful! Questions? Email me or leave a comment! I will work on getting this tutorial on video this weekend, and yes, I still have cards to finish.....at least I got one done today.
Have a fabulous Friday!
33 comments:
Fabulous tutorial! Thank you so much!
Thanks for sharing. I think the red gasket is pretty close to the tan embossing mat I got to use with my Nestabilities, but I will try to emboss with my brass templates and see how well it works. Would love to see a video, 'cause I'm addicted to 'em! LOL
kathynruss
Thanks soooo much! I have been doing a little embossing with my Cbug and brass stencils but this tutorial really makes it very clear so I hope to get even better results now.
that is too cool i am so going to have to try that.
Thank you so much for this tutorial. I have been wondering how to do this.
Thanks!
What a great tut... I have been wanting to make better use out of my fiscars plates and now to be able to emboss with my stencils, wonderful. Thanks...
Now for my question. Is the rubber reusable or do you have to buy one for each item you use to emboss?
Hi Donna,
I use the same red rubber over and over, hasn't seemed to be a problem at all.
When I purchased the kit I did buy two though, in case I did need a replacement.
You are a genius!.. I just bought my CB last weekend and wondered how in the world am I going to use my brass stencils that I accumulated over the yrs.
Thanks so much for the great tutorial on this.
Robin
wow, I will have to try this one too...I just hope I can find a gasket kit also...what is it used for exactly? Thanks for the tutorial..
Hi Monika,
You can get the kit online if you can't find it locally, I posted a link on the video posting, which was posted the other day.
The rubber/cork is used to help get a good embossed image. The stencil is basically pressured into the paper, and the rubber helps create enough "give" to shape the paper.
Thanks so much for sharing this, now maybe I will use my dozens of of brass stencils.
Should be able to find it in the plumbing section of your hardware store.The gasket material is used to repair water pumps.
I couldn't find the gasket at the hardware store, but I used an old computer mouse pad and it worked well.
When you chalk the images, do you do it with the stencil in place, and just use craft chalk, to color it?
I was told you had to mist the paper before embossing this way to get a deep impression, but doesn't seem to be so......
Thanks for sharing!
Annie
Hi Annie,
I haven't tried misting the paper first, but will do so today, the method works well without misting.
You can chalk with the stencil in place, or you can just chalk carefully on the image without the stencil, or you can even just rub various colors over the images to get more of a "messy" look (I showed how to do that on the video)
Have fun : )
Hi! I'm brand new to your blog, but am LOVING IT!!!! Thanks so much for your great tutorials! You ROCK! Lynn B
Fantastic tutorial! Thank you for share this idea with us. Unfortunately I am unable to buy this item here in the UK, (I have searched the UK website but no joy!!! If any one out there knows of one, please do let me know). Could you please suggest any other material that might be just as good!!!
Jasu
Hi . . . I found this great info . . . do you know if the same method will work in the original sizzix with any brass stencil . . . I've been trying to find a way . . .
I don't have the Cuttlebug yet . . . maybe soon though . . .
Great tutorial Jacquie! Thanks so much, I would never have know what to look for at the hardware store! ;)
smiles,Deena
Thank you very much I was wondering how to use my Fiskars embossing plates with the Big Shot, but I think this gasket kit is a brilliant idea, I will be posting a link on my blog if you do not mind.
Hi, I came across your site just browsing- fabulous cards and brilliant tutorials. Just wanted to mention something about embossing- if you have the origial Sizzix, and the Sizzix converter plate ( the magnetic one that attaches to the pressure plate), you can use Cuttlebug embossing folders in it.
This site has a great downloadable pdf that gives really good instructions for brass stencils and Sizzix too.www.splitcoaststampers.com/forums
I am so excited about finding this
tutorial about using brass stencils in the CB. I have some
favorite stencils but my hands lack
the strenth to do all the dry embossing by hand. Now I can use
them. Thank you so much. My daughter, JennMarie sent me your
tutorial. Stampin' Moo
This is a great tutorial. I was so disappointed trying to use my brass stencils before with my machine. Thanks so much for posting this!
I can't find that do-it-yourself gasket kit, or a link to it on your site.
I called my local Home Depot and Lowes, and they had no idea what I was talking about.
I see one online made by Ace Hardware (the local store doesn't carry it), but I don't know if the rubber and cork are exactly the same thickness as yours. Please tell me where I can find the gasket kit.
Thanks so much!!!!
Charli
Sheryl said...
This is a great tutorial. I was so disappointed trying to use my brass stencils before with my machine. Thanks so much for posting this!
I can't find that do-it-yourself gasket kit, or a link to it on your site.
I called my local Home Depot and Lowes, and they had no idea what I was talking about.
I see one online made by Ace Hardware (the local store doesn't carry it), but I don't know if the rubber and cork are exactly the same thickness as yours. Please tell me where I can find the gasket kit.
Hi there Sheryl,
The one Ace Hardware sells online should be fine, and I had a link on my blog with some searches I did for other places to purchase the kit, will check and post it again : )
Have a grand day.
Jacquie
What an outstanding idea!
This method isn't working. It is too hard to push through and I don't want to force it. I tried both the brass stencil and fiskars recipes exactly as you did it. My Cuttlebug is brand new. Does it have to be "broken in" to be more flexible?
ScottieToo: Try removing the cork and using two pieces of cardstock, it will still be hard to push through but should work. If two pieces of card stock aren't enough, they try three, or if two are too much, then do one.
Let me know if that works.
Learned something interesting:"All rubber and cork gaskets are not equal." Couldn't find the Kit anywhere, but found each sold separately. Those didn't work. Went to another hardware store and brought those with me. Found them separately again, but these were both thinner. Hurray! The second ones work. Thanks for the tip, Jaquie, but looks like I'm in business. Thanks for your help.
Thanks for a great tutorial! I found this via the Papercraft Planet discussion and I am stoked! I was wondering what to do with my brass stencils that I purchased when I first started card making...
Arabella
Thanks so much for this tutorial!!!
Hi there, I have just found your link and this wonderful hint, I have battled for ages to get a decent dry embossing finish using brass stencils, now I will give this a try and hope it works for me. Thanks very much for the tip. Hugs Ursula X
Did you know that you can buy a rubber pad for your machine thru Amazon.com for about $10. I wanted some Anna Griffin dies for my Cuttlebug and didn't know I needed an additional rubber pad until i saw them use it during a demo on a TV Shopping channel. Of course, your idea is cheaper and if it works go for it!
Post a Comment